How to Create a New Agreement:
1. Navigating to the Dashboard

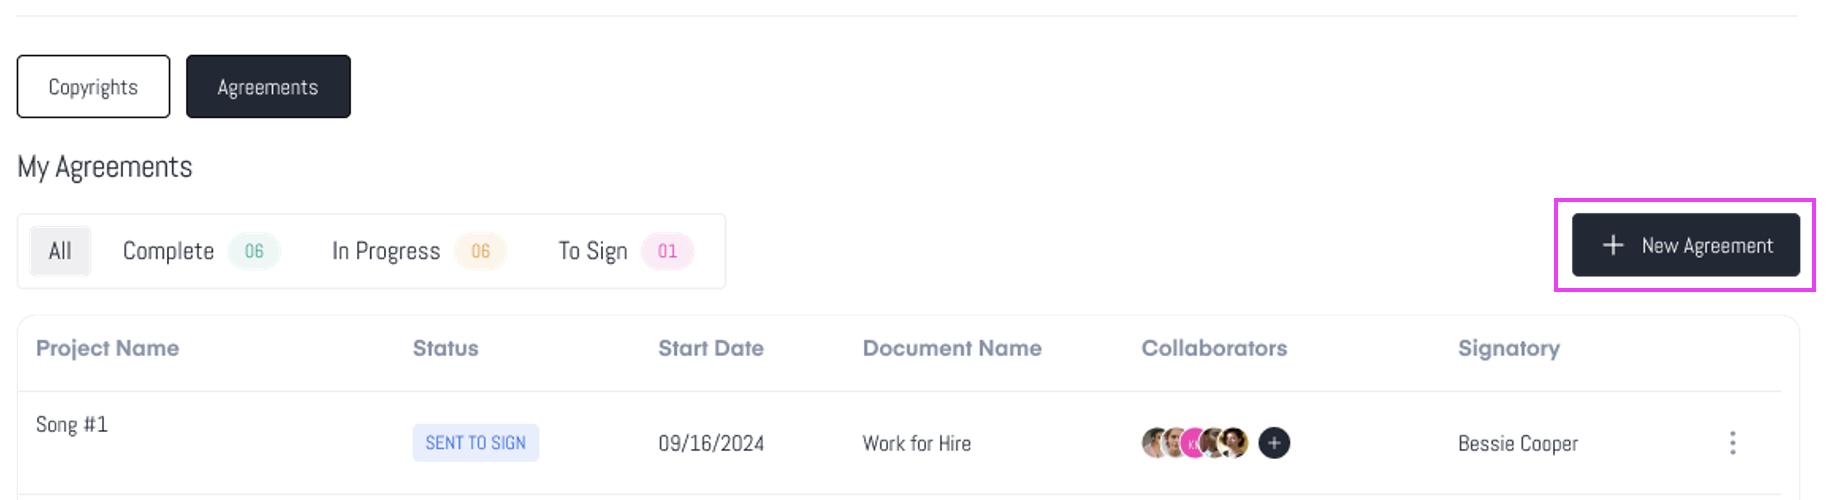
2. Accessing Agreements
- Click on the "Agreements" button to view all of your agreement details.
3. Initiating a New Agreement
- Click the "New Agreement" button to start a new agreement
4. Navigating to the Agreements Template
- You will be directed to the "Agreements" Template section of the platform.

- The Agreements Templates are organized by parent group with the specific contracts nested under each parent group.
- To view the specific contracts click the type of agreement you would like to start and the additional agreements will appear in the window below.

5. Choosing a Agreement Template
- You are now in the agreement templates section. Here, you'll find a variety of agreements perfectly crafted for every role you're working with.
6. Selecting a Music Agreement
- Click the agreement icon that you would like to use.

7. Viewing the Document Overview
- You'll be directed to the agreement overview page once you've selected the agreement type and collaborator role.
8. Understanding the Agreement Details
- The overview provides important information on the agreement you are about to use, such as when, how, and important considerations about why you are using it.

9. Reviewing the Document
- You can review the agreement and its language by scrolling through the viewer window to ensure it's the correct document. Please note that full scrolling access is available only to subscribed members of the platform.

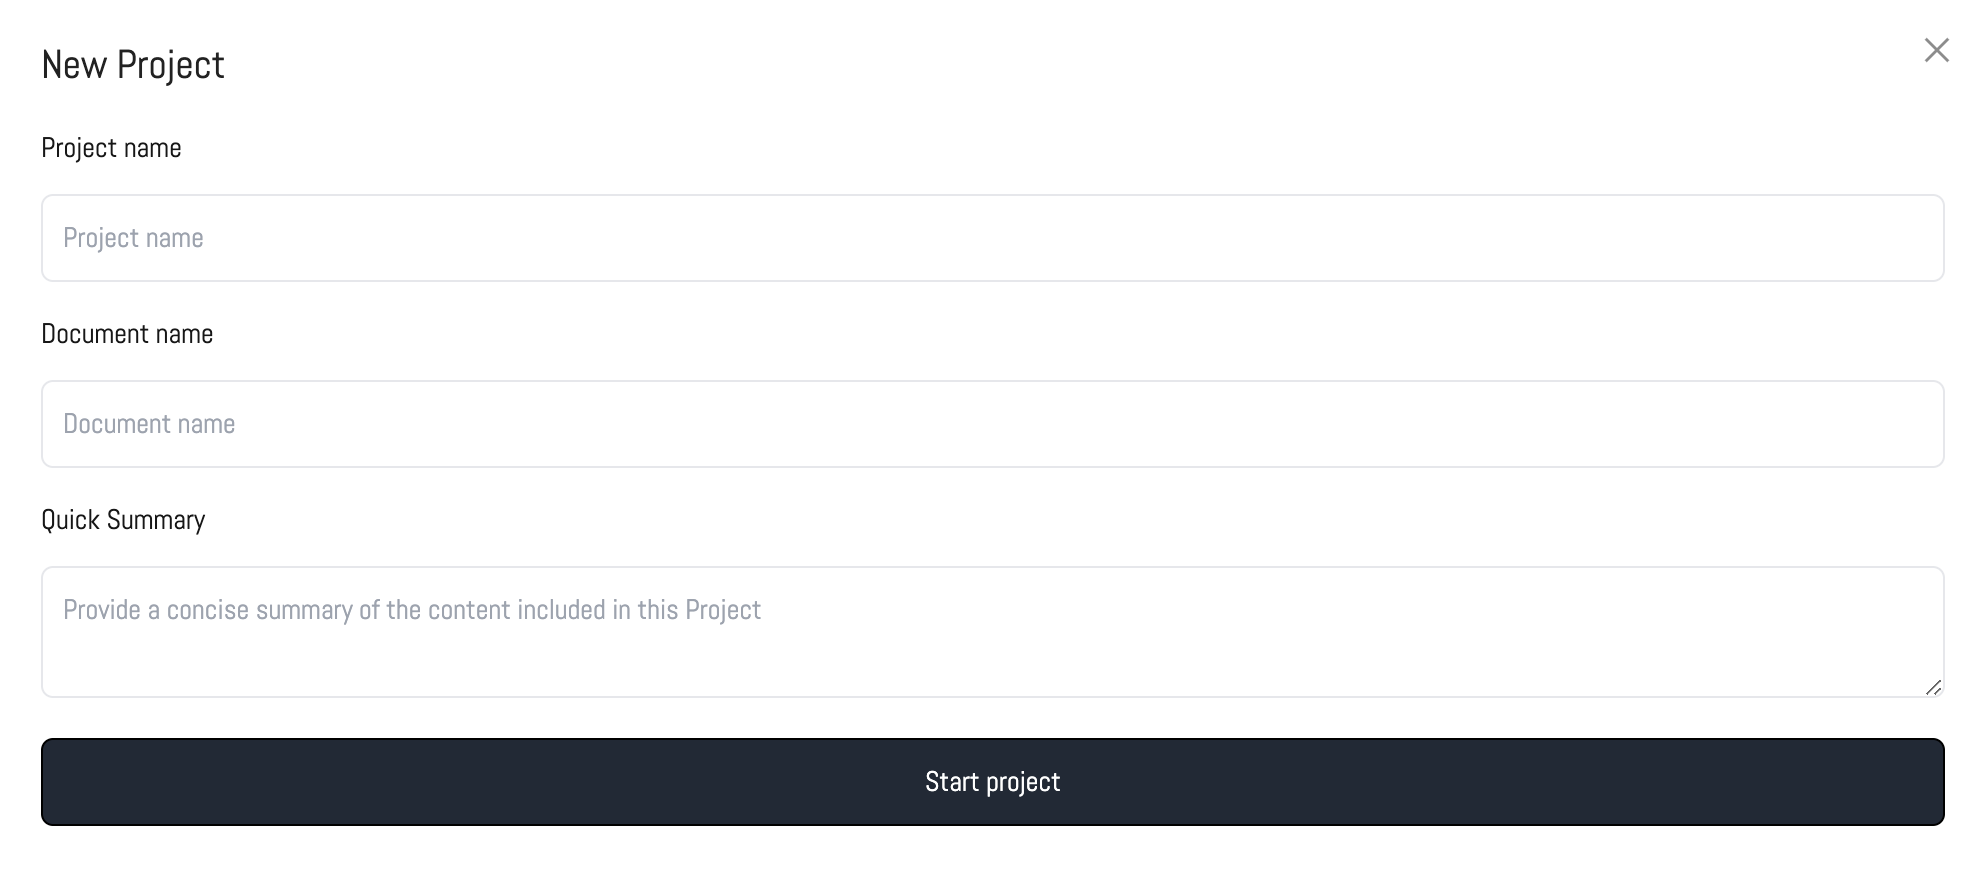
10. Creating a New Project with the Document
- Click the "Create New Project with This Doc" button.
11. Launching the New Project Window
- This will launch the "New Project" window. You will input the "Project Name," "Document Name," and a quick project summary here.
12. Starting the Project
- Click the "Start Project Now" button.
13. Smart Document Setup (Chatbot Q&A)
Once your project starts, our Smart Document Chatbot will appear.
The chatbot is designed to make filling out legal documents faster and easier by using:
Your profile information
Previously entered answers
Context from similar documents you’ve created

It will ask a short series of questions to gather the details needed to populate your document accurately.
After answering all questions, you can:

Review and edit any responses
Make manual updates if needed
Click “Populate Document” to automatically insert your answers into the document

14. Editing the Document
- This will take you to the editing window, where you can customize and update the document before starting the collaboration phase of your project. Don’t worry—you’ll still be able to make edits once you're in the collaboration space of the platform!

15. Moving to the Collaboration Phase
- Once you edit the project, click the "Continue" button, and you'll move into the collaboration portion of the platform, where you can work directly with collaborators i.e. other businesses, members of your team, etc.

Next, you’ll enter the collaboration space, where you can invite collaborators, leave comments on the agreement, and more. Click here to learn more.
Was this article helpful?
That’s Great!
Thank you for your feedback
Sorry! We couldn't be helpful
Thank you for your feedback
Feedback sent
We appreciate your effort and will try to fix the article